
Proofing Like a Pro: A Checklist for Catching Errors on Your Wedding Stationery
Proofing wedding stationery sounds simple… until you’re staring at a screen after a long day, your partner is reading it differently than you are, and your mom has strong feelings about whether “Doctor” should be written out. Here’s the good news: most invitation mistakes are completely avoidable. You don’t need a design degree or a Type-A personality to proof your stationery well - you just need a smart, repeatable process. This is the checklist I recommend to to keep proofing calm, efficient, and (most importantly) accurate.
Why proofing matters more than you think:
Your invitation suite becomes the source material for everything else: your wedding website, day-of signage, escort cards, menus, programs, and even how guests enter your address into their GPS. When your stationery is correct, planning feels smoother. When it isn’t, tiny errors can ripple into bigger headaches later.
Before you start: set yourself up for success.
Review online, then print a copy. Start by reviewing your proofs on screen (you’ll catch overall layout and design quickly), then print everything for a second pass. Even a simple home printout helps you spot typos, spacing issues, and little alignment quirks that are easy to miss digitally.
Proof when your brain is fresh. Try to proof in the morning, or at least not at the end of a chaotic day. Proofing requires focus more than inspiration.
Choose 1 or 2 trusted extra eyes. After you’ve done your own careful pass, ask a couple of trusted friends or family members to review as well. Fresh eyes catch what we naturally skim past—especially in names, dates, and addresses. Tip: give them a specific job (“Please check spelling, dates, times, and addresses”) so you don’t end up with ten opinions on font sizes or the design you have your heart set on.
Decide who’s “the final approver.” Too many cooks can create confusion. It’s helpful if one person owns the final decisions and consolidates feedback into one clear set of notes.
The Proofing Like a Pro checklist:
Here’s how to proof in the order that catches the most mistakes:
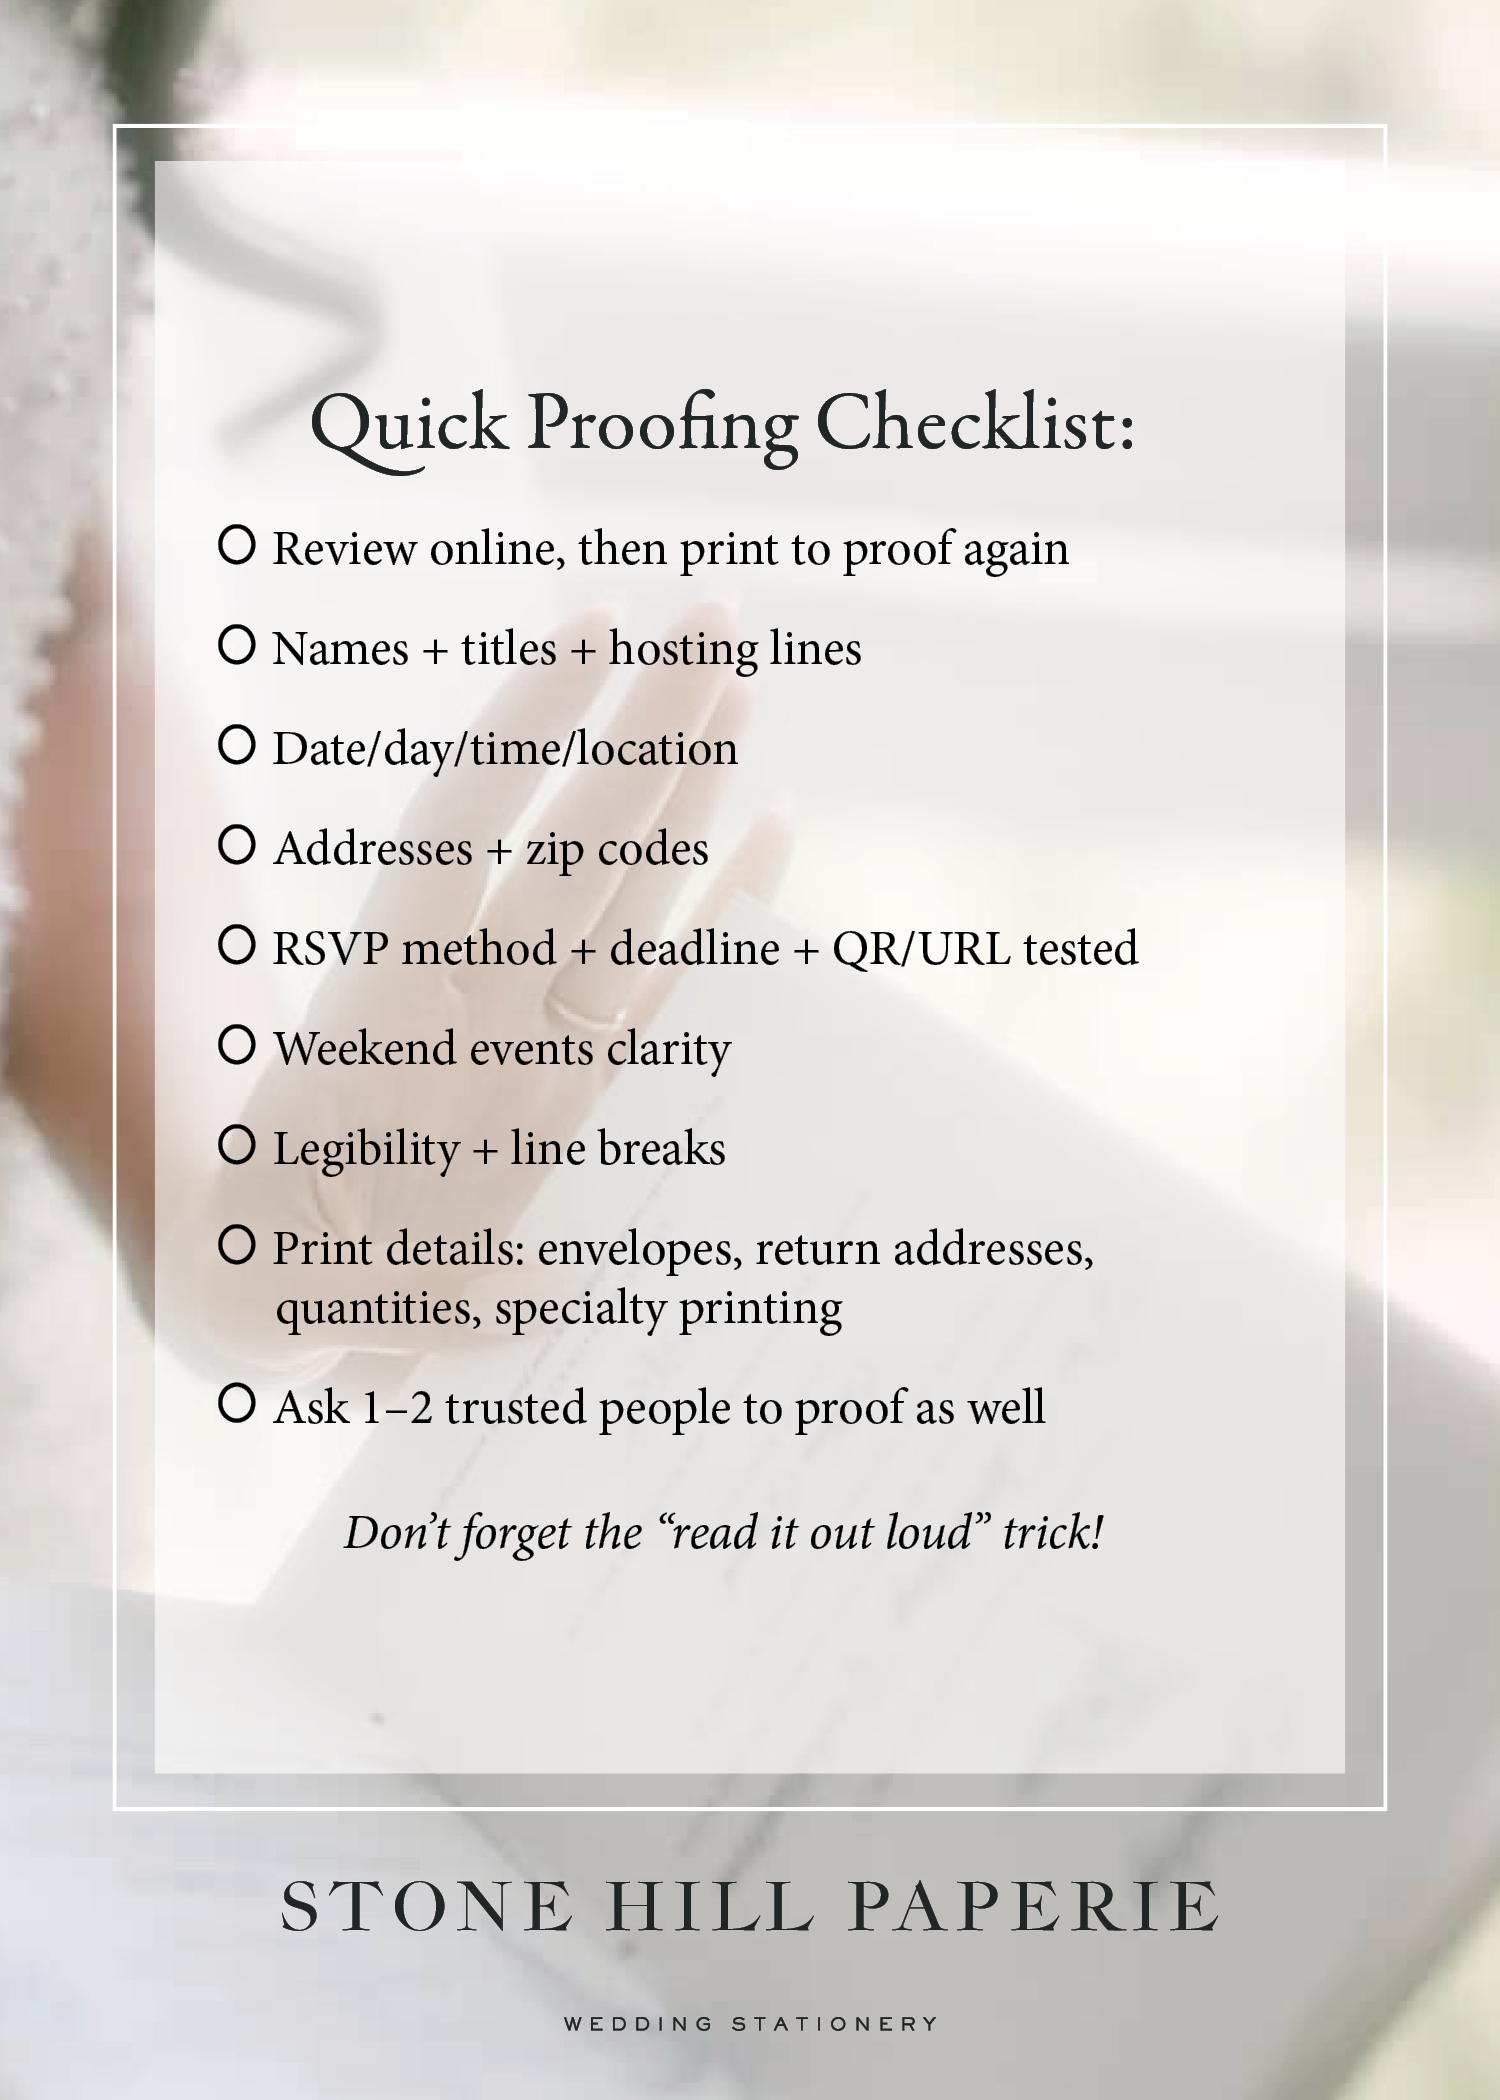
Step 1: Check names and hosting lines.
- spelling of all names (including middle initials if used)
- titles (Dr., Doctor, Mr., Mrs., Ms.) and consistency
- order of names (especially if you’re listing both sets of parents)
- punctuation around titles and suffixes (Jr., III)
Step 2: Check dates, times, and locations.
- day of the week matches the date
- correct time(s)
- venue spelling and capitalization
- city/state formatting
- ceremony vs reception locations (if different)
Step 3: Check address formatting and zip codes.
- venue address (include suite/ballroom name if needed)
- zip code accuracy on guest addresses
- spell out state names
- capitalization and abbreviations (Street vs St., Avenue vs Ave.)
Step 4:
Check attire, RSVP, and deadline details.
- attire wording
- RSVP deadline and method
- if you’re using a QR code, confirm the link works
- if you’re including a website URL, verify it is typed correctly, test it
Step 5: Extra weekend events and “who gets what”
If you have a welcome party, rehearsal dinner, farewell brunch, etc., confirm:
- which events are listed where
- whether the language makes it clear that some events are invitation-only
- dates/times/locations for each event are correct and consistent
Step 6: Check spacing, hierarchy, and legibility. This isn’t about being picky—it’s about making sure the design reads beautifully and effortlessly.
- is anything too small to read comfortably?
- are there awkward line breaks (especially in names and long venue titles)?
- does it feel balanced, or is one section visually heavy?
Step 7: Check print-specific details (the ones people forget).
- return address and reply-to address are correct
- quantity is correct (and you’ve ordered 10-15 extras for keepsakes and re-sends)
The “read it out loud” trick.
This is my favorite proofing hack. Read each piece out loud slowly - even if it feels silly. Your brain fills in missing words when you read silently. Out loud, mistakes pop.
When to stop proofing (yes, really)
There’s a point where you’re no longer catching real errors—you’re just second-guessing. Once names, dates, times, locations, and key details are verified, you can trust the work. If you’re feeling stuck, walk away for a few hours and do one final pass with fresh eyes. That final calm review is usually the most effective one.
If you’re in the middle of proofing right now, I hope this made the process feel simpler. And if you want a designer who will guide you through the details with a steady hand, I’d love to help.
If you’re planning a wedding and want to explore working together, you can reach out here.